Prevent Production Outages: API IP Whitelist Playbook for Engineers

Use an API IP whitelist when your consumers connect from fixed, identifiable egress addresses; skip straight to private connectivity or strong application authentication when they don’t. IP allowlisting enforces default-deny at the network layer and works well for known clients, but it’s a blunt instrument that needs to sit alongside real authentication, not replace it. The first move, before writing a single rule, is mapping the public egress IP for every client and every staging environment that will talk to the API.
TL;DR:
- IP allowlists work best with clients that use fixed, publicly visible egress addresses, but they require careful mapping and testing of each environment’s actual outbound IPs.
- Reverse proxies and load balancers often rewrite source IPs, making trusted IPs unreliable unless you handle
X-Forwarded-Forheaders securely and explicitly.- Allowlists can become outdated or overly permissive if not managed actively, so routine audits, specific CIDR use, and automatic stale entry detection are essential.
- Relying solely on IP allowlisting is risky; it should be complemented with cryptographic or application-layer authentication, especially in dynamic or mobile environments.
How Do You Set Up API IP Whitelisting?
Most API gateways and firewalls evaluate allowlist rules with the same basic logic: match the source IP against a list of permitted addresses, and decide what happens on a non-match. Azure API Management’s ip-filter policy makes this explicit through an action attribute set to either allow or forbid. When action="allow", any request that doesn’t match a listed address or address range gets denied — there’s no implicit pass-through. That single detail causes more outages than any other misconfiguration, because teams forget a legitimate egress path exists until it gets blocked in production.
A typical Azure policy snippet looks like this:
<ip-filter action="allow">
    <address>198.51.100.24</address>
    <address-range from="203.0.113.0" to="203.0.113.255" />
</ip-filter>
APISIX’s ip-restriction plugin follows a similar pattern but uses explicit arrays and lets you customize the rejection behavior:
{
  "whitelist": ["198.51.100.24", "203.0.113.0/24"],
  "message": "IP address not allowed",
  "response_code": 403
}
APISIX also supports a blacklist mode and lets you customize both the message body and response code returned on rejection, which matters for debugging later.
A few configuration details determine whether these rules behave the way you expect:
- CIDR notation lets you allow a range without listing every address;
/32allows exactly one IP, while/24covers a typical class C subnet containing many addresses. - Use
/32for single dedicated servers or NAT gateways with a static IP, and a wider range only when a provider publishes a documented, stable CIDR block. - Order matters in most gateways: more specific rules should generally be evaluated before broader ones to avoid a wide range accidentally permitting an address you meant to exclude.
- Error responses should be distinct and loggable. A generic 403 tells you nothing; a custom message or code like
ip_not_authorizedtells you exactly which control fired.
When an allowlist policy is set to allow mode, everything not explicitly permitted is rejected by default. That single behavior is why testing before go-live matters more than the rule syntax itself.
OpenAI’s own allowlist documentation recommends verifying each workload’s public egress path and confirming it with a check tool before switching enforcement on, a step worth borrowing regardless of which gateway you use.
What Breaks Naive Allowlists in Production?
The address a gateway sees is not always the address a request actually came from. Reverse proxies, load balancers, and CDNs frequently rewrite the visible source IP to their own, which is why the X-Forwarded-For header exists and why trusting it blindly is dangerous. Misconfigured trusted-proxy handling lets an attacker spoof that header and trick the gateway into treating an arbitrary request as coming from an allowed client. Only trust X-Forwarded-For values from proxies you explicitly control, and APISIX’s real-ip plugin integration is built specifically to resolve this in proxied deployments.
Egress design deserves equal attention. Cloud instances that scale horizontally rarely keep a stable outbound IP unless you force the issue with a NAT gateway, an elastic IP pinned to a specific resource, or a managed egress path. Provider-native private connectivity, such as AWS PrivateLink or Azure Private Endpoints, sidesteps the public IP problem entirely by keeping traffic off the public internet.
Two address ranges cause recurring, avoidable incidents:
- 100.64.0.0/10, the Shared Address Space reserved under RFC 6598 for carrier-grade NAT. It’s not routable on the public internet and has no business identifying an external client.
- 168.63.129.16, a Microsoft Azure platform virtual IP used for internal services like DNS and health probes. Blocking it can break Azure platform functionality, and allowlisting it as a “client” makes no sense.
Serverless functions and CI/CD runners deserve their own note: their egress IPs often come from a shared, provider-managed pool that can change without warning, which makes static IP allowlisting unreliable unless the provider publishes a fixed range or you route that traffic through a dedicated NAT instance first.
Pro Tip: Before enabling any allow-mode rule, run your test traffic through the exact same network path production traffic will use, including the load balancer or proxy hop, not a direct connection from your laptop.
How Do You Keep an Allowlist From Turning Into a Liability?
Allowlists accumulate cruft the same way any access control list does: someone adds a rule during an incident, the incident resolves, and nobody removes it. A few operational habits keep that from compounding.
- Favor the narrowest CIDR block that covers the actual client, and assign a named owner to every rule so someone is accountable when it’s time to review it.
- Automate detection of stale entries by cross-referencing allowlist rules against actual traffic logs on a recurring schedule, not an annual audit.
- Treat allowlist changes like any other production change: require a second reviewer, log the diff, and keep a rollback path ready.
- Build a time-limited exception process for one-off needs (a vendor migration, a temporary partner test) so short-term rules expire automatically instead of living forever.
- Log every denied request with enough detail to distinguish a misconfigured legitimate client from a scan or attack attempt.
Network engineers who filter routing tables warn that blocking or trusting un-delegated or reserved prefixes without automated verification causes outages, because regional registry delegations shift regularly. The same caution applies to allowlists: a rule that was accurate six months ago may not be today.
Pro Tip: Set a recurring calendar reminder, not a one-time task, to diff your allowlist against actual traffic logs. Rule bloat is gradual, and it’s almost always the root cause when an allowlist “randomly” blocks a legitimate client.
How Do You Test and Debug an IP Allowlist?
Before trusting any allowlist rule, confirm it against the real network path rather than assumptions.
- Identify the public egress IP the client path actually uses, not the IP an engineer’s laptop reports, since these are frequently different once NAT or a proxy is involved.
- Run a
curlrequest from the exact client environment (the actual server, container, or function) and cross-check the result against gateway logs, not just the HTTP response. - Watch for the difference between error types: a 403 Forbidden typically means the gateway rejected the request outright, while a custom 401 with
ip_not_authorizedsignals the request reached authentication but failed the IP check specifically. Knowing which one fired tells you whether the problem is network-level or policy-level. - External IP-check services are useful for confirming what address a given environment presents to the outside world before you add it to a rule.
Roll changes out in stages: enable in monitor-only or log-only mode first, review what would have been blocked, and only then switch to full enforcement. A staged rollout is the difference between catching a missing egress path in a dashboard and catching it from a customer support ticket after a production lockout.
Should You Rely on IP Allowlisting Alone?
An IP allowlist compares packet source addresses; it has no visibility into request payloads, so a malicious body from an approved IP sails right through without the inspection of a high performance, low rules maintenance WAF for Nginx. It’s also brittle against any client whose address changes, which describes a large share of modern cloud and mobile infrastructure.
Treat allowlisting as one layer, not the whole defense:
- Mutual TLS verifies client identity cryptographically, independent of network position.
- OAuth or JWT-based authentication confirms who is calling, which an IP check never can.
- Private Link or VPC peering removes the public exposure question entirely by keeping traffic off the internet.
- A dedicated egress gateway or NAT instance gives you one stable, auditable address to allowlist instead of managing a sprawling list of client IPs.
Each option trades operational complexity for a different kind of assurance. Mutual TLS demands certificate lifecycle management; Private Link demands cloud-networking familiarity; a dedicated egress gateway is often the simplest to operate and the easiest to reason about during an incident.
Handling IPv6 Addresses in IP Allowlists
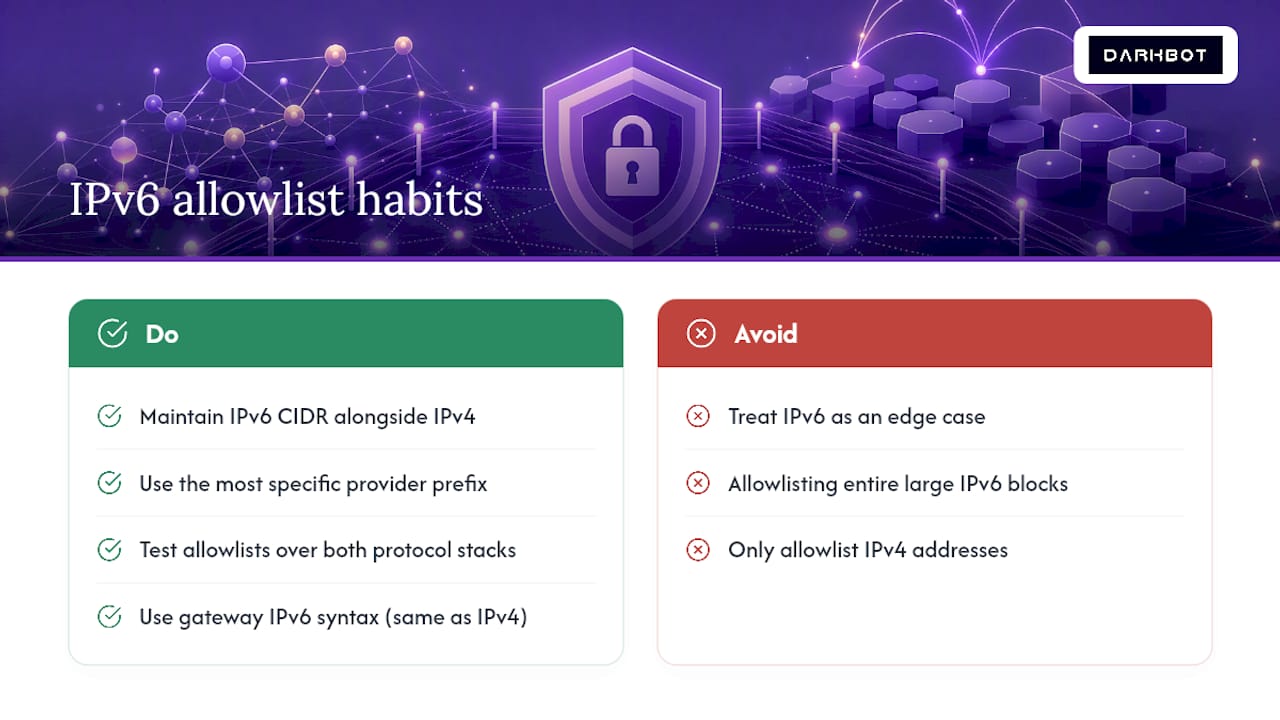
IPv6 changes the arithmetic of allowlisting in ways that catch teams off guard. An IPv4 /32 allows exactly one host, but IPv6 subnets are typically assigned in /64 blocks or larger, meaning a single organization’s allocation covers billions of theoretical addresses. Allowlisting an entire /64 because one host inside it needs access is far looser than it looks at first glance.
Dual-stack environments add another wrinkle: a client might reach your API over IPv4 in one request and IPv6 in the next, especially on mobile networks or when a cloud provider’s routing shifts. An allowlist that only covers IPv4 addresses will silently fail the moment that client’s IPv6 path becomes the default route, producing intermittent, hard-to-reproduce access failures.
Practical handling comes down to a few habits: always maintain IPv6 CIDR entries alongside IPv4 ones rather than treating v6 as an edge case, prefer the most specific prefix your provider’s stable allocation actually uses, and test allowlist rules over both protocol stacks before enforcing allow mode. Most modern gateways, including Azure’s ip-filter policy and APISIX’s ip-restriction plugin, accept IPv6 addresses and ranges using the same syntax as IPv4, so the configuration burden is mostly about discovery and testing, not new tooling.
When Should Allowlisting Be Part of Your Security Stack?
IP allowlisting earns its place for fixed-egress clients: partner integrations, admin APIs, and internal service-to-service calls where the source address is genuinely stable. It stops being useful, and starts being a liability, the moment it’s treated as sufficient on its own rather than one layer among several, including application-level authentication covered in Darkbot’s API key security overview. In practice, the most common cause of outages isn’t a clever attack. It’s an allowlist nobody pruned.
— Grisha
Where Darkbot Fits Into Your API Security Setup
Teams integrating with cryptocurrency exchanges face a narrower version of the same problem: matching a trading platform’s egress behavior against each exchange’s IP security settings without breaking automated strategies mid-cycle. Darkbot connects to major exchanges through API key integrations, and many exchanges support IP-based restrictions on those keys, which lets you pair read-only or trade-scoped keys with a documented, predictable egress path instead of guessing at it. Working with a platform whose connection behavior is documented removes one variable from your allowlist configuration, since you’re not reverse-engineering which address a bot will use on a given day. If you want to see how Darkbot structures exchange API integrations and security controls in practice, the details are on Darkbot.
Sources
- IP allowlist | OpenAI API
- What is IP address 168.63.129.16? | Microsoft Learn
- RFC 6598 — Shared Address Space
- ip-filter - Azure API Management policy reference
- ip-restriction | Apache APISIX
FAQ
What Does It Mean to Whitelist an API?
Whitelisting an API means configuring the gateway or firewall to accept requests only from a defined set of IP addresses or CIDR ranges, rejecting everything else by default.
How Do I Whitelist an IP Address?
Identify the public egress IP or CIDR range your client actually uses, then add it to your API gateway’s or firewall’s allow list, such as an Azure ip-filter policy or an APISIX ip-restriction rule, and test before enforcing.
What Is 100.64.0.0/10 Used For?
It’s Shared Address Space reserved under RFC 6598 for carrier-grade NAT; ISPs use it internally, and it’s not routable on the public internet, so it should never appear as a client entry in a public allowlist.
What Is 168.63.129.16 Used For?
It’s a Microsoft Azure platform virtual IP used for internal services like DNS and health monitoring, not a client address, and it should never be blocked.
Does Darkbot Support IP-Based API Security?
Darkbot integrates with major exchanges through API key connections, and many of those exchanges let you pair the key with IP restrictions for an added layer of access control.
Recommended

Start trading on Darkbot with ease
Come and explore our crypto trading platform by connecting your free account!
Free plan available • No credit card required