Stop Loss Strategies That Actually Protect Trading Capital
Place your stop where the trade idea breaks down, not where you feel comfortable. That means locating it beyond a structural level or a volatility band (an ATR multiple), then sizing the position so a hit costs no more than 1% to 2% of account equity. Everything else, order type, trailing rules, position math, is a refinement of that one sentence.
Before opening a position, run this checklist:
- Stop type: hard stop at a structural or ATR-based invalidation point, not a mental stop.
- Position-sizing check: dollar risk at the stop distance stays within your 1% to 2% cap.
- Trailing rule: decide in advance how the stop moves once the trade is profitable, and only in one direction.
Two quick examples on a $50,000 account: at 1% risk, you can lose $500 before the stop triggers; at 2%, $1,000. If your ATR-based stop sits $2 below entry on a stock, the $500 cap limits you to 250 shares; the $1,000 cap allows 500. The stop distance decides the size, never the other way around.
TL;DR:
- Place stops beyond a structural or volatility band to limit losses to 1-2% of account equity, and never widen stops after trade entry.
- Use hard stop orders on the exchange or broker for reliability, reserving stop-limit or trailing stops for specific market conditions or trending positions.
- Calculate position size based on the stop distance and risk percentage, applying layered risk caps to manage overall drawdowns effectively.
- Reassess trailing stops regularly, implementing automatic, rule-based adjustments to lock in profits without emotional intervention.
- Rely on automated tools that execute predefined stop and size rules to eliminate hesitation and enforce discipline during volatile market moves.
What Are the Main Stop Loss Strategies and Order Types?
A stop order sits dormant until price touches your trigger, then converts to a market order and fills at the next available price. A stop-limit order does the same but caps the fill price, which protects against a terrible fill but risks no fill at all during a fast move. A trailing stop recalculates its trigger as price moves in your favor, either on your broker’s server or inside your own trading software. A mental stop is not an order at all, it is a plan you intend to execute by hand, and it is the weakest link in most trading systems because it depends entirely on you being present, alert, and unemotional at the exact moment it matters.

Execution quality varies a lot between these types. A stop order can slip past your intended price during a fast market or a gap, filling worse than expected because the order becomes a market order the instant it triggers. A stop-limit order avoids slippage but can leave you holding a losing position with no exit if price gaps straight through your limit price. Server-side trailing stops, the kind executed by the exchange or broker rather than your local terminal, keep working even if your connection drops; client-side trailing stops, run from your own screen or a disconnected app, stop protecting you the moment your session ends.
For most retail traders, the practical guideline is simple:
- Default to hard stop orders placed directly on the exchange or broker, not mental stops.
- Use stop-limit orders only in liquid instruments where gap risk is low.
- Reserve trailing stops for trending positions where you have tested the trail distance against the instrument’s typical volatility.
Retail traders rarely have the infrastructure or discipline to manage a mental stop consistently across dozens of trades a month, which is one reason automated risk management systems exist. They remove the moment of hesitation entirely.
How Do You Decide Where to Place a Stop Loss?
Four methods cover most trading styles, and each answers a different question about where a trade idea actually fails.
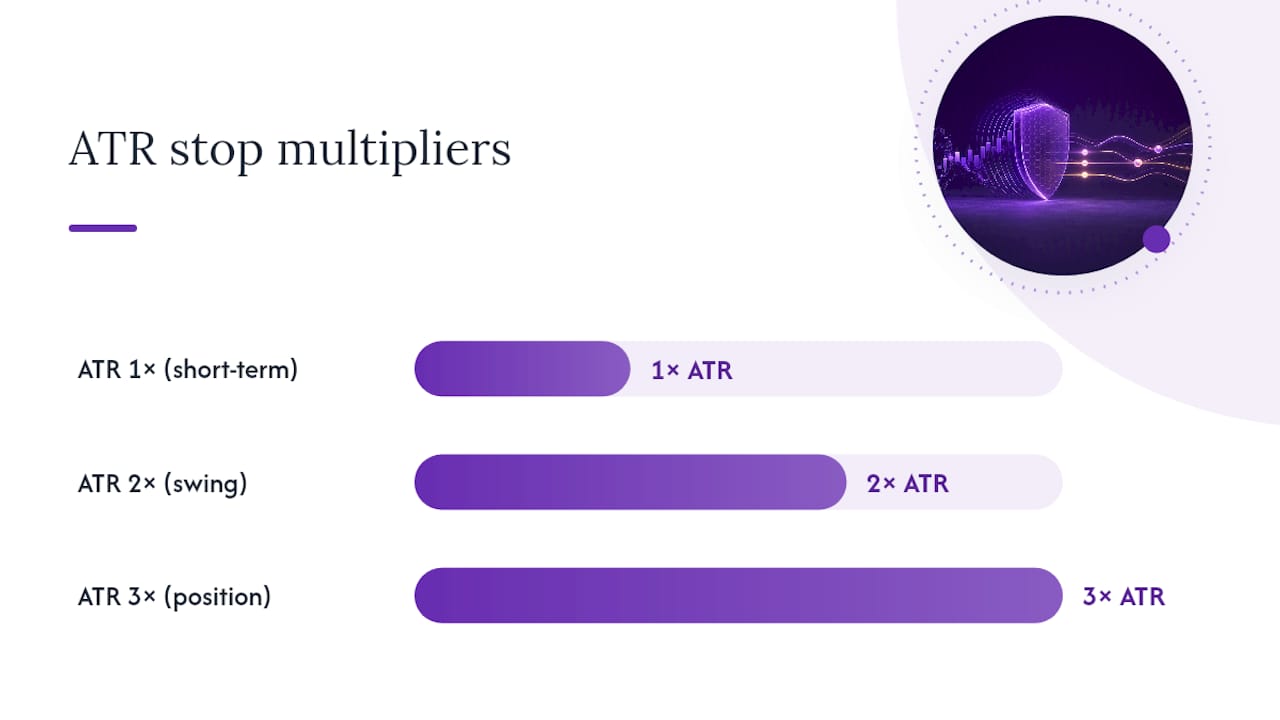
1. ATR (volatility-based) stops. The formula is Stop = Entry − (ATR × multiplier) for a long position, and the reverse for a short. A 1× ATR multiplier creates a tight stop suited to short-term momentum trades where you want to exit quickly if the move stalls. A 2× multiplier is the standard choice for swing trades holding several days to weeks. A 3× multiplier suits position trades where you expect normal pullbacks and want to avoid getting shaken out by noise, though it requires a smaller position size to keep dollar risk constant, as APEX Stock Intel’s guidance on multiplier selection makes clear.
**2. The buffer matters because placing a stop exactly at an obvious swing point invites a stop run: a brief spike that clears out stops before price reverses in the direction you originally expected. Ticker Daily’s placement research recommends this buffer specifically to reduce the odds of getting stopped out by noise rather than a genuine trend reversal.
3. Moving-average stops. The 20-day moving average works for short-term trend trades, the 50-day for intermediate swing positions, and the 200-day for long-term trend followers who only want to exit on a major structural shift. Using a moving average as your invalidation signal means you exit not on a single day’s low but on a sustained close below the average, which filters out a lot of single-day noise.
**4. Its weakness is that it ignores the instrument’s actual behavior: an 8% stop on a low-volatility utility stock is far wider than the price action justifies, while the same 8% stop on a volatile small-cap gets hit by routine swings.
| Method | Typical Use Case | Formula or Rule |
|---|---|---|
| ATR (1×) | Short-term momentum | Entry − (1 × ATR) |
| ATR (2×) | Standard swing trade | Entry − (2 × ATR) |
| ATR (3×) | Position trade, wider swings | Entry − (3 × ATR) |
| Structure | Trades built around a support/resistance level | Beyond swing low/high + 0.5–1% buffer |
| Moving average | Trend-following exits | Close below 20/50/200-day MA |
| Percentage | Quick, rule-of-thumb exits | Fixed % below entry, checked against ATR |
How Do You Calculate Position Size From Your Stop?
Stop placement tells you where the trade fails. Position size tells you how much that failure costs, and the two are inseparable. The 2% Rule from CME Group frames this plainly: never risk more than 2% of account equity on a single trade, and many traders tighten that to 1% specifically to survive a longer losing streak without meaningful damage to the account. The rationale is arithmetic, not superstition.
The position size formula is straightforward: Position Size = (Account Equity × Risk %) ÷ Stop Distance per Share (or Contract). Investopedia’s position-sizing guide walks through this using fixed-dollar, percentage-based, and volatility-adjusted variants, all of which reduce to the same core idea: let the stop distance, not a round number of shares, decide the trade size.
- $10,000 account, 1% risk, $1 stop distance: risk $100 total, buy 100 shares.
- $50,000 account, 2% risk, $4 stop distance: risk $1,000 total, buy 250 shares.
- $100,000 account, 1% risk, $0.50 stop distance: risk $1,000 total, buy 2,000 shares.
Position sizing alone does not protect an account across a bad week. A layered risk-management system, stacking per-trade limits with daily and weekly caps, catches problems a single rule misses.
| Drawdown Level | Suggested Action |
|---|---|
| 3% daily loss reached | Stop trading for the day |
| — | Reduce position size by 50% |
| 10% account drawdown | Pause trading, review strategy before resuming |
Kelly Criterion sizing, which scales bet size to your actual edge and win rate, can theoretically outperform fixed-percentage sizing, but full Kelly is aggressive enough to produce brutal drawdowns even with a genuine edge. Most retail traders who use it at all run “Kelly-lite,” a fraction of the full Kelly stake, precisely because the math assumes perfect knowledge of your win rate and payoff ratio, something few traders actually have. Pyramiding, adding to a winning position, follows the same logic in reverse: it only makes sense once the trade has moved far enough to justify treating the position as lower-risk than the original entry.
How Should You Trail a Stop to Lock In Profits?
A trailing stop’s entire job is to give a winning trade room to breathe while refusing to let it round-trip back to a loss. The mechanics differ by method, but the goal is identical: convert an open, unrealized gain into a protected floor.

ATR trailing recalculates the stop distance as the trade moves, typically using the same 2× or 3× multiplier discussed earlier in placement. As the ATR expands during high volatility, the trail widens automatically; as volatility contracts, it tightens. A trader running a 2× ATR trail on a position that has moved from an ATR of $1.50 at entry to $1.00 as volatility cools will see the trail distance shrink from $3.00 to $2.00, locking in more of the gain without manual adjustment.
Structure-based trailing steps the stop under each new confirmed swing low in an uptrend (or above each new swing high in a downtrend), so the protected level only ever ratchets in your favor. Time-based trailing exits after a fixed holding period regardless of price action, and it suits situations with a known catalyst, an earnings date, a contract expiration, where holding past that point changes the trade’s risk profile entirely.
- Never move a stop further away from price after entry, only ever closer.
- Reassess the trail distance after major volatility shifts, not on a fixed schedule.
- Treat a move to breakeven as a trailing step, not a separate decision.
- Log every trail adjustment so you can review whether your trailing rule actually improved outcomes over time.
Pro Tip: Set your trailing rule in writing before you enter the trade, not after it becomes profitable. Deciding the rule while you are sitting on a gain almost guarantees you will loosen it to protect the number on the screen rather than the strategy.
What Mistakes Turn a Stop Loss Into a Liability?
The single most damaging habit is widening a stop after the trade is already open. If a position needs more room to work, the fix is a smaller position size chosen before entry, never a wider stop chosen after price starts moving against you. Widening a stop mid-trade converts a planned, sized risk into an unplanned, unbounded one.
Placing a stop exactly at a round number or an obvious chart level is the second common error; obvious levels attract exactly the kind of stop-hunting the buffer rule addresses. A third mistake is treating a stop as a paperwork exercise rather than a hard order: mental stops and “I’ll get out if it gets bad” plans fail precisely when discipline matters most, during a fast, emotional move.
- Never widen a stop once a position is open; resize before entry instead.
- Add a 0.5% to 1% buffer beyond obvious support, resistance, or round-number levels.
- Use hard orders on the exchange, keep a trading journal, and track your R-multiple distribution to catch bad habits early.
- Check the instrument’s typical spread and volume before trading it; illiquid instruments produce worse stop fills and more slippage.
How Do You Implement a Stop Loss Strategy Step by Step?
A workable process runs the same four stages on every trade, regardless of instrument or timeframe.
- Pre-trade: Identify the invalidation point using structure or ATR, measure the stop distance in dollars or ticks, then compute position size from your risk percentage and account equity.
- Order placement: Enter the hard stop order alongside your entry, set an initial take-profit target or define your trailing rule in advance, and confirm the fill on both the entry and the protective order.
- Active management: Apply your trailing rule as the trade moves in your favor, move to breakeven at a predefined trigger rather than an emotional one, and scale out or pyramid only according to rules set before entry.
- Post-trade: Record the R-multiple outcome, note whether you followed the plan exactly, and review the rule set periodically if your win rate or average R starts to degrade.
| Stage | Key Action | Output |
|---|---|---|
| Pre-trade | Identify invalidation, compute stop distance and size | Defined risk in dollars |
| Order placement | Set hard stop and profit target/trail | Confirmed working orders |
| Active management | Trail, breakeven, scale as planned | Adjusted stop, no widening |
| Post-trade | Log R-multiple, review rule adherence | Journal entry, updated edge assessment |
Adjust the placement method to market conditions rather than sticking with one approach regardless of context. In a trending market, structure and moving-average stops tend to hold up because pullbacks are shallower and swing lows keep stepping higher. In a ranging market, ATR-based stops generally perform better because price oscillates without forming the kind of clean structure a trend provides, and a tight structure stop in a range gets clipped repeatedly.
What Does Research Say About Stop Loss Discipline?
Backtest reviews on systematic and trailing exit rules generally find that disciplined, rule-based selling reduces the depth of drawdowns compared to holding through declines without a defined exit, and some reviews find modest improvements in long-term returns as a result, a pattern summarized in independent research on stop-loss effectiveness. The benefit is not that stops predict reversals; it is that they cap the left tail of the return distribution, which matters more to long-term compounding than most traders initially assume.
The core finding across this research is not that any single stop-placement rule is optimal. It is that layered, mechanically enforced risk controls, position sizing plus a stop plus daily and weekly caps, consistently outperform relying on any one rule in isolation.
The Sharpe ratio remains a useful, neutral yardstick when comparing how a given stop-loss approach affects risk-adjusted returns in your own backtests, since it accounts for both the return generated and the volatility endured to get there.
Darkbot’s platform includes server-side trailing stops that continue functioning independent of your local connection, position-sizing tools that calculate share or contract counts from your risk percentage automatically, and backtesting and paper-trading environments where a given stop and sizing template can be tested against historical data before it touches real capital. These are execution and testing tools, not predictive ones, and automation of this kind works by consistently applying a rule set you have already defined, never by guessing where price goes next. Testing a template in a paper account first remains the only way to see how a given rule set actually behaves before committing capital to it.
Key Takeaways
| Point | Details |
|---|---|
| Placement comes first | Choose an ATR, structure, or moving-average invalidation point before deciding position size. |
| Size to risk, not comfort | Use the formula (Equity × Risk %) ÷ Stop Distance to fix position size on every trade. |
| Layer your limits | Combine per-trade risk caps with daily and weekly loss limits. |
| Trail in one direction only | Move stops closer to price as trades gain, never further away, regardless of method. |
| Automation removes hesitation | Darkbot’s server-side trailing stops and position-sizing tools apply a predefined rule set consistently, without emotional interference. |
Where to Read More on Stop Placement and Risk Rules
- CME Group’s explanation of the 2% Rule lays out the arithmetic behind capping single-trade risk and remains the clearest primary source on the practice.
- Investopedia’s position-sizing guide covers fixed-dollar, percentage, and volatility-adjusted sizing methods in more depth than most trading blogs attempt.
- APEX Stock Intel’s stop-loss breakdown is a solid reference for ATR multiplier selection across different holding periods.
- Ticker Daily’s placement guide is useful for the structural buffer rule and avoiding stop-hunting on obvious levels.
- Tradezella’s risk-management guide details the layered system of position sizing, stops, and daily/weekly caps referenced throughout this article.
Test any rule set from these sources in a paper trading account before applying it with real capital; a backtest or a well-written framework only proves the logic holds up on past data, not that it will behave identically going forward.
How Darkbot Applies These Rules Without the Manual Work
Its server-side trailing stops keep working independent of whether your terminal is open, its position-sizing calculators convert a chosen stop distance directly into contract or share counts based on your risk percentage, and its backtesting and paper-trading environments let you validate a stop-and-sizing template against historical data before committing capital.

None of this predicts where price goes next. What it does is remove the specific behavioral failure covered earlier in this article, the tendency to widen a stop or skip a sizing rule under pressure, by applying the same logic on every trade regardless of how the last one went. If you want to see how a structure or ATR-based stop template performs across historical data before running it live, you can start with a Darkbot trial and paper-test your rule set before any capital is at risk.
Why Discipline Beats Prediction in Stop Placement
Most of what separates traders who survive from traders who blow up an account has nothing to do with picking better entries. That gap between the rule on paper and the rule under pressure is where most retail accounts actually lose their edge.
The uncomfortable part of this is that stop placement itself is the easy half of the problem. Anyone can calculate 2× ATR below an entry price. Sizing to that stop and refusing to touch it once price starts moving is the harder, less discussed half, and it’s the half that a spreadsheet or a mental note tends to fail at exactly when it matters most. Automated execution does not solve trading. It solves the specific, well-documented failure of not doing what you already decided to do. Test your rules in a paper account first, keep a journal of every R-multiple, and treat rule adherence itself as a metric worth tracking, not just profit and loss.
— Grisha
Sources
- The 2% Rule - CME Group
- Determine Position Size - Investopedia
- Risk Management in Trading: The Complete Guide (2026)
- Stop Loss Strategies: ATR, Percentage & Support-Based Methods | APEX Stock Intel
- Stop-Loss Strategies: Where to Place Them (and Where Not To) — Ticker Daily
FAQ
What Is the Best Practice for Setting a Stop Loss?
The best practice is to place the stop at a genuine invalidation point, using structure, ATR, or a moving average, then size the position so the dollar loss at that stop stays within 1% to 2% of account equity, following the CME Group 2% Rule framework.
What Is the 7% Stop-Loss Rule?
It works best when calibrated against the instrument’s actual ATR first, since a fixed percentage can be too tight or too wide depending on the asset’s volatility.
What Is the Golden Rule for Stop-Loss Orders?
The golden rule is never to move a stop further away from price after the trade is open. If a trade needs more room, that decision belongs before entry, through a smaller position size, not after entry through a widened stop.
What Is the 2% Rule for Stop-Loss Placement?
The 2% rule caps the dollar risk on any single trade at 2% of total account equity, calculated from the stop distance and position size together, as outlined by CME Group’s risk management education.
Can Automation Replace a Manual Stop-Loss Plan?
Automation does not replace the plan, it executes it consistently. Platforms like Darkbot apply predefined stop and sizing rules through server-side orders, removing the hesitation that causes manual traders to widen stops or skip sizing checks under pressure.

Start trading on Darkbot with ease
Come and explore our crypto trading platform by connecting your free account!
Free plan available • No credit card required